
How to Customise Sender Email on Subscription app
By default, subscription emails to your customers are sent from noreply@essentialsubscriptions.com, with your store name as the sender name. You can change the sender name, or send from your own address, such as subscriptions@yourstore.com.
This page covers emails to your customers. Staff notifications always come from the app's own address. See Staff Notifications.
Step 1: Open the sender email settings
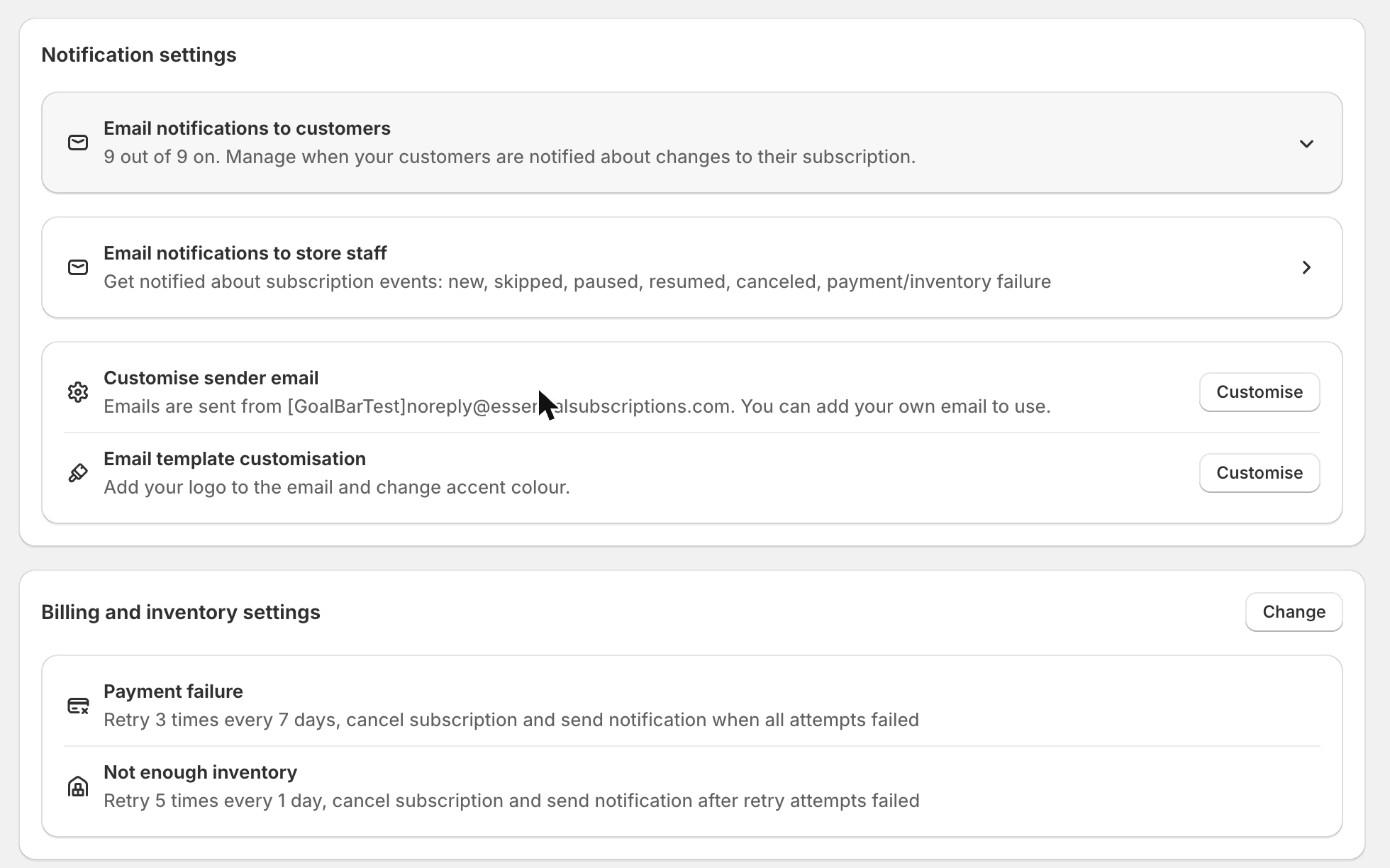
- Open Settings.
- In the Notification settings card, find Customise sender email. It shows your sender address. If you set a custom address that is not verified yet, it shows the custom address with a Not verified badge, while emails still go from the default address.
- Click Customise.
You can also get here from any customer email editor. Under the Subject field, click Add email.
Step 2: Keep the default address, or choose Custom
The Sender email card has two options.
Default address
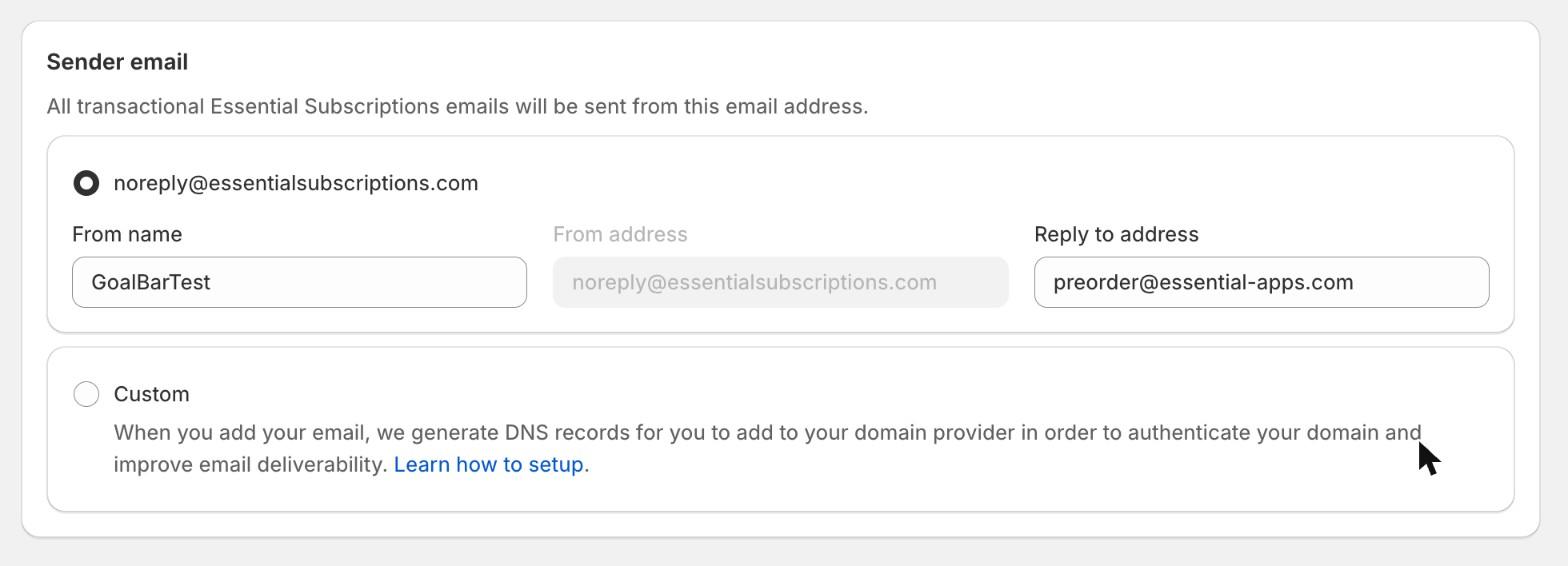
The first option is labelled with the default address, noreply@essentialsubscriptions.com. Select it to keep sending from there. You can set:
- From name: the sender name your customers see. Required. When you install the app, it is filled in with your store name.
- From address: greyed out. It is always the default address.
- Reply to address: required. When you install the app, it is filled in with your store email.
Click Save in the save bar. Nothing else is needed.
Custom address
- Select Custom.
- Fill in From name, From address and Reply to address. All three are required. The From address must be on a domain you own and whose DNS you can edit.
- Click Save in the save bar.
After you save, the app creates two DNS records for your domain and shows them under DNS records. The records do not appear until you save.
Step 3: Add the DNS records and verify your domain
Until your domain is verified, you see this banner: Until your domain is verified, emails will be sent from noreply@essentialsubscriptions.com. Your emails keep going out from the default address, with your From name. On the Settings page, the sender email row shows a Not verified badge.
- Copy each record from the DNS records table. There is one CNAME and one TXT record.
- Add both at your domain host.
- Come back and click Verify.
The full steps, with what each result means, are in How to Set Up DKIM for Your Sender Email.
Step 4: Check it worked
When both records are verified:
- You see the message Domain verified.
- Both rows in the table say Verified.
- A green check appears next to From address.
- The banners disappear, here and on the Settings page.
Click Send test email. The button only works once the domain is verified. The test goes to your store email address, from your custom address, with the subject Setup a custom email.
From now on, customer emails are sent from your own address.
Changing your address later
If you change the From address and save, the app asks you to confirm: Change sender email? Click Change to go ahead.
- Same domain (for example, from subs@yourstore.com to hello@yourstore.com): your DNS records stay, and so does your verification.
- New domain: the old domain is removed and new records are created. Add the new records and click Verify again. Until then, emails go from the default address.
If you switch back to the default address and save, your custom domain is removed. There is no confirmation for this. To use your own address again later, choose Custom, save, and add the records the app shows you then.
Messages you might see
- Email domain already taken: you entered an address on essentialsubscriptions.com. Use your own domain.
- Email domain already used by another shop: this domain is set up on another store with this app. Contact support.
- Invalid from address or Invalid reply to address: check the address for typos.
- Could not save custom email domain or Could not delete custom email domain: try saving again. If it keeps happening, contact support.