
Walkthrough: set up your first order value booster (Essential Free Shipping Upsell app)
This walkthrough shows you how to create a booster in the Essential Free Shipping Upsell app, from the first screen to publishing. The steps use the Product page booster type, but the same tabs are used for every booster type.
Watch the app overview video: How to Add Free Shipping Bar on Shopify
1. Open the boosters list
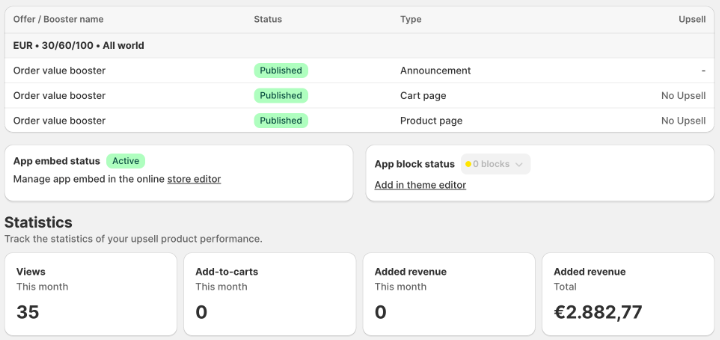
Open the Essential Free Shipping Upsell app from your Shopify admin. The boosters list shows each booster with its name, status (Published or Not Published), and type. App embed status is shown in a separate status panel. Statistics, such as add-to-carts and added revenue, appear when they are available for your plan.
2. Create a booster and choose its type
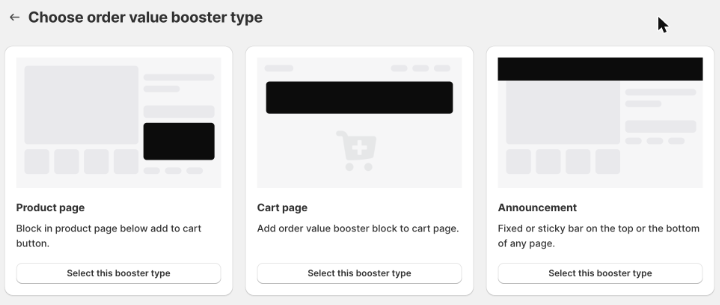
Click to add a new booster. Choose one of the three booster types:
- Product page: appears below the Add to Cart button.
- Cart page: appears on the cart page and in supported cart drawers.
- Announcement: a bar fixed or sticky at the top or bottom of any page.
3. Set up the offer
On the Offer tab, you can set up to three goals on one progress bar. For Goal 1, enter the Cart total and choose what the customer gets: free shipping, a free gift, or an order discount. Click Add goal to add Goal 2 and Goal 3 (Essential and Professional plans). The cart total must be above 0, and each goal needs a different cart total.
For a free gift, choose the gift product for that goal. Free shipping can be used in one goal only, and each free gift goal needs a different gift product. You can use order discounts in more than one goal, as long as each higher goal has a larger discount.
[SCREENSHOT 3: Offer tab with three goals]
The preview on the right shows how the progress bar will look. Each goal appears as a milestone on the bar, in order of cart total.
[SCREENSHOT 3b: Progress bar preview with milestones]
Free shipping shows progress only. To actually give free shipping, set it up in your Shopify shipping settings, as explained in the shipping article.
4. Add upsell products (optional)
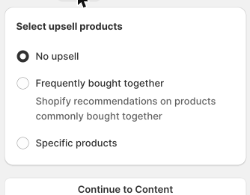
On the Upsell tab, choose no upsell, Shopify's recommended products (Frequently bought together), or products you pick yourself (Specific products). Some options depend on your plan.
5. Write the messages
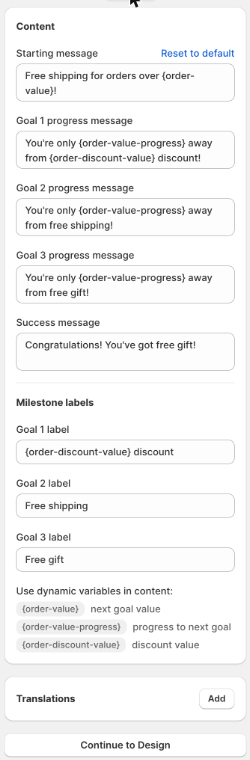
On the Content tab, edit the messages that customers see before and after they reach the goal. The app uses different messages depending on whether the goal has been reached. With more than one goal, each goal also has its own progress message and milestone label.
6. Style the booster
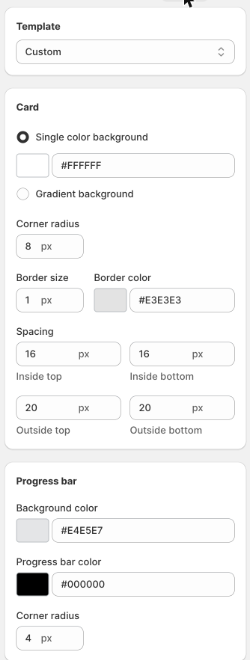
On the Design tab, change the font, colours, background, border, and spacing. Product page and cart page boosters have more options than announcements. The title's font weight is always bold.
7. Set the placement and targeting
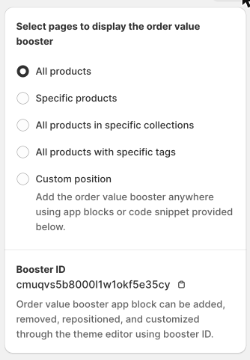
On the Placement and Targeting tab, choose where the booster appears: all products, selected products, collections, or product tags, depending on the booster type and your plan. You can also set country targeting and exclusions.
Save or publish the booster to see its Booster ID on this tab. You need the ID if you use Custom position.
8. Turn on the app embed
In the app's App embed status panel, check that it shows Active. If it is Inactive, open the link to the online store editor, turn on the app embed, and click Save. Then return to the app.
9. Publish the booster
Click Publish. The booster status changes to Published, and it appears in your store. Save keeps your changes without publishing them. To stop showing a booster, click Unpublish.
If a validation message appears, check the highlighted settings, for example the goals. If a plan restriction blocks publishing, an upgrade message is shown.